This is the second article on dual-booting Windows 7 andUbuntu 10.10 on a computer with one hard disk. The first,how to dual-boot Ubuntu 10.10 and Windows 7, showed how to accomplish the task with GRUB 2, the boot loader used by Ubuntu, installed on the Master Boot Record (MBR) of the hard disk. That is, GRUB is responsible for the dual-booting task. The problem with that configuration is that GRUB files tend to be overwritten when you upgrade Windows. To get around that problem, the recommended method is to install GRUB not on the MBR, but on the boot partition of Ubuntu.
That is the purpose of this tutorial. To show how to dual-boot Windows 7 and Ubuntu 10.10 where the Windows Boot Manager is responsible for dual-booting both Operating systems.
Note that this tutorial assumes installation on a computer with an existing installation of Windows 7. Here are the tasks involved:
- Download Ubuntu – Ubuntu 10.10 Desktop edition is used for this tutorial
- Install Ubuntu – the key point at this step is to remember to install GRUB in the boot partition
- After installation, boot into Windows and download and install EasyBCD. Use EasyBCD to add an entry for Ubuntu in the Windows boot menu
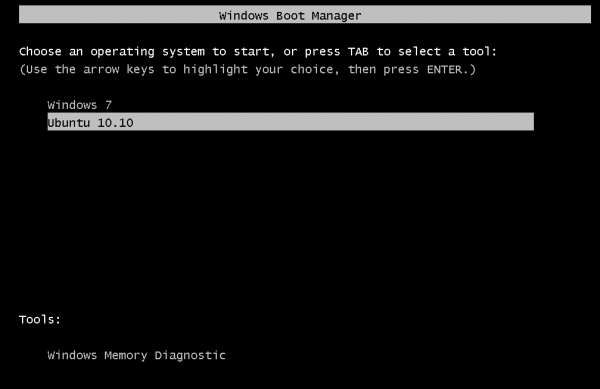
The result is shown below. Any time you reboot the computer, the Windows boot menu will give you the option to boot into either Windows 7 or Ubuntu 10.10. Note that with this configuration, you will still have access to the GRUB menu, if you decide to boot into Ubuntu.

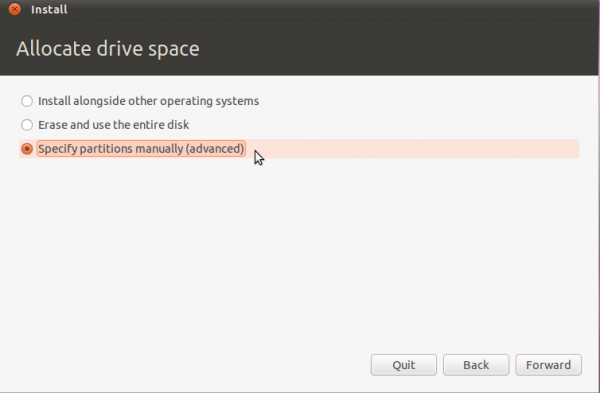
Now, lets start. To reduce the number of images used, the tutorial begins at the disk partitioning step. You have three options. The first might seem like the best option, but if you select that, you will have no say on where GRUB is installed. The installer will actually install GRUB in the MBR, overwriting the Windows boot files. The second option is obviously out of the question. That leaves the last option, and that is the option you want to select. So, select it and click Forward.
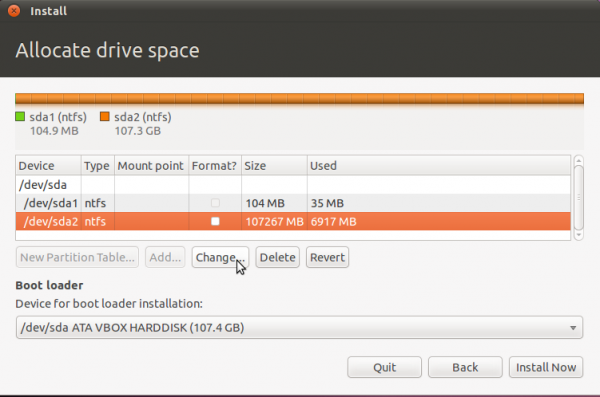
The images used in this tutorial were obtained from a test installation in a virtual environment with about 100 GB of disk space. The default partitions created by Windows are shown below. The first, /dev/sda1, is the system partition. The second, /dev/sda2, is the data partition. To install Ubuntu, we are going to resize this data partition, and install Ubuntu in the reclaimed space. How much space can we reclaim? It depends on the amount of space used by Windows (the last column in the image gives you that figure). For this installation, you can see that I can reclaim a sizable chunk of the space left. To resize the partition, select it and click the Change button.
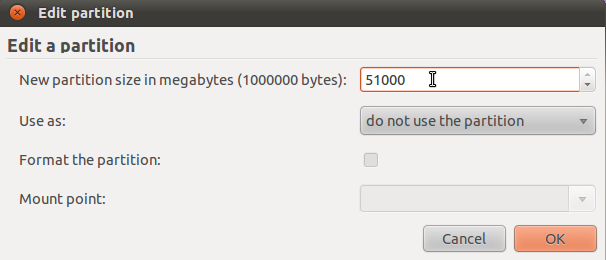
For this tutorial, I am going to reduce the partition’s size by about 56 GB. The remaining space should be more than enough for Windows 7. By how much you reduce your own partition will, of course, depend on the size of the disk you are working with.
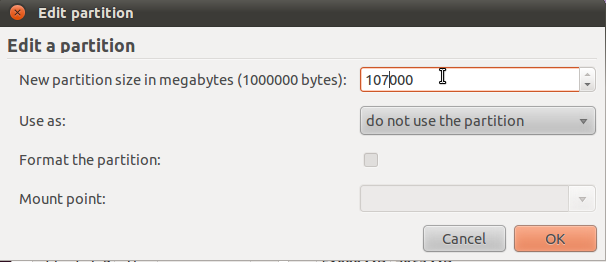
This is the final cut. Note that the size is the only thing you change. Do not change any other thing or you will likely hose your Windows installation. OK.
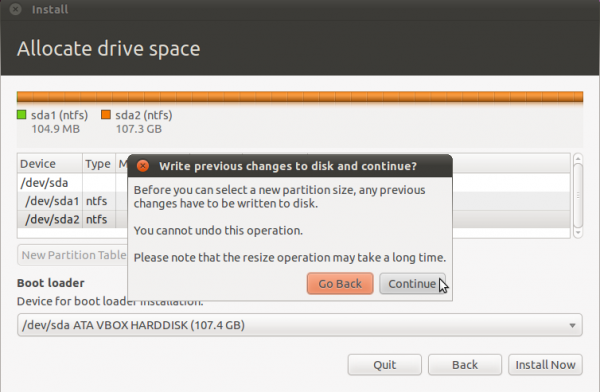
This is just a friendly warning. Continue.
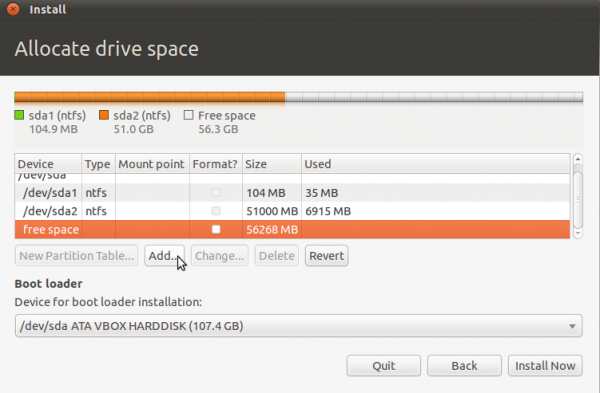
With the free space reclaimed from the Windows partition, now you can start creating partitions for Ubuntu. Select the free space as shown and click Add. Note that you will have to repeat this step for all the partitions you will be creating.
For this tutorial, four partitions will be created. These will be used for /boot, /, swap, and /home file system directories. You can create as many partitions as you need, but for a typical desktop, these will be sufficient.


{ 0 komentar... read them below or add one }
Posting Komentar